Alert Bar & Pop-Up Modal
When you need to share time-sensitive information or promote something special on your website, Alert Bars and Pop-Ups are two simple and effective ways to do it. Both are designed to grab attention—but in slightly different ways. Here’s how they work and how you can use each one strategically.
What’s the Difference Between Alert Bars and Pop-Ups?
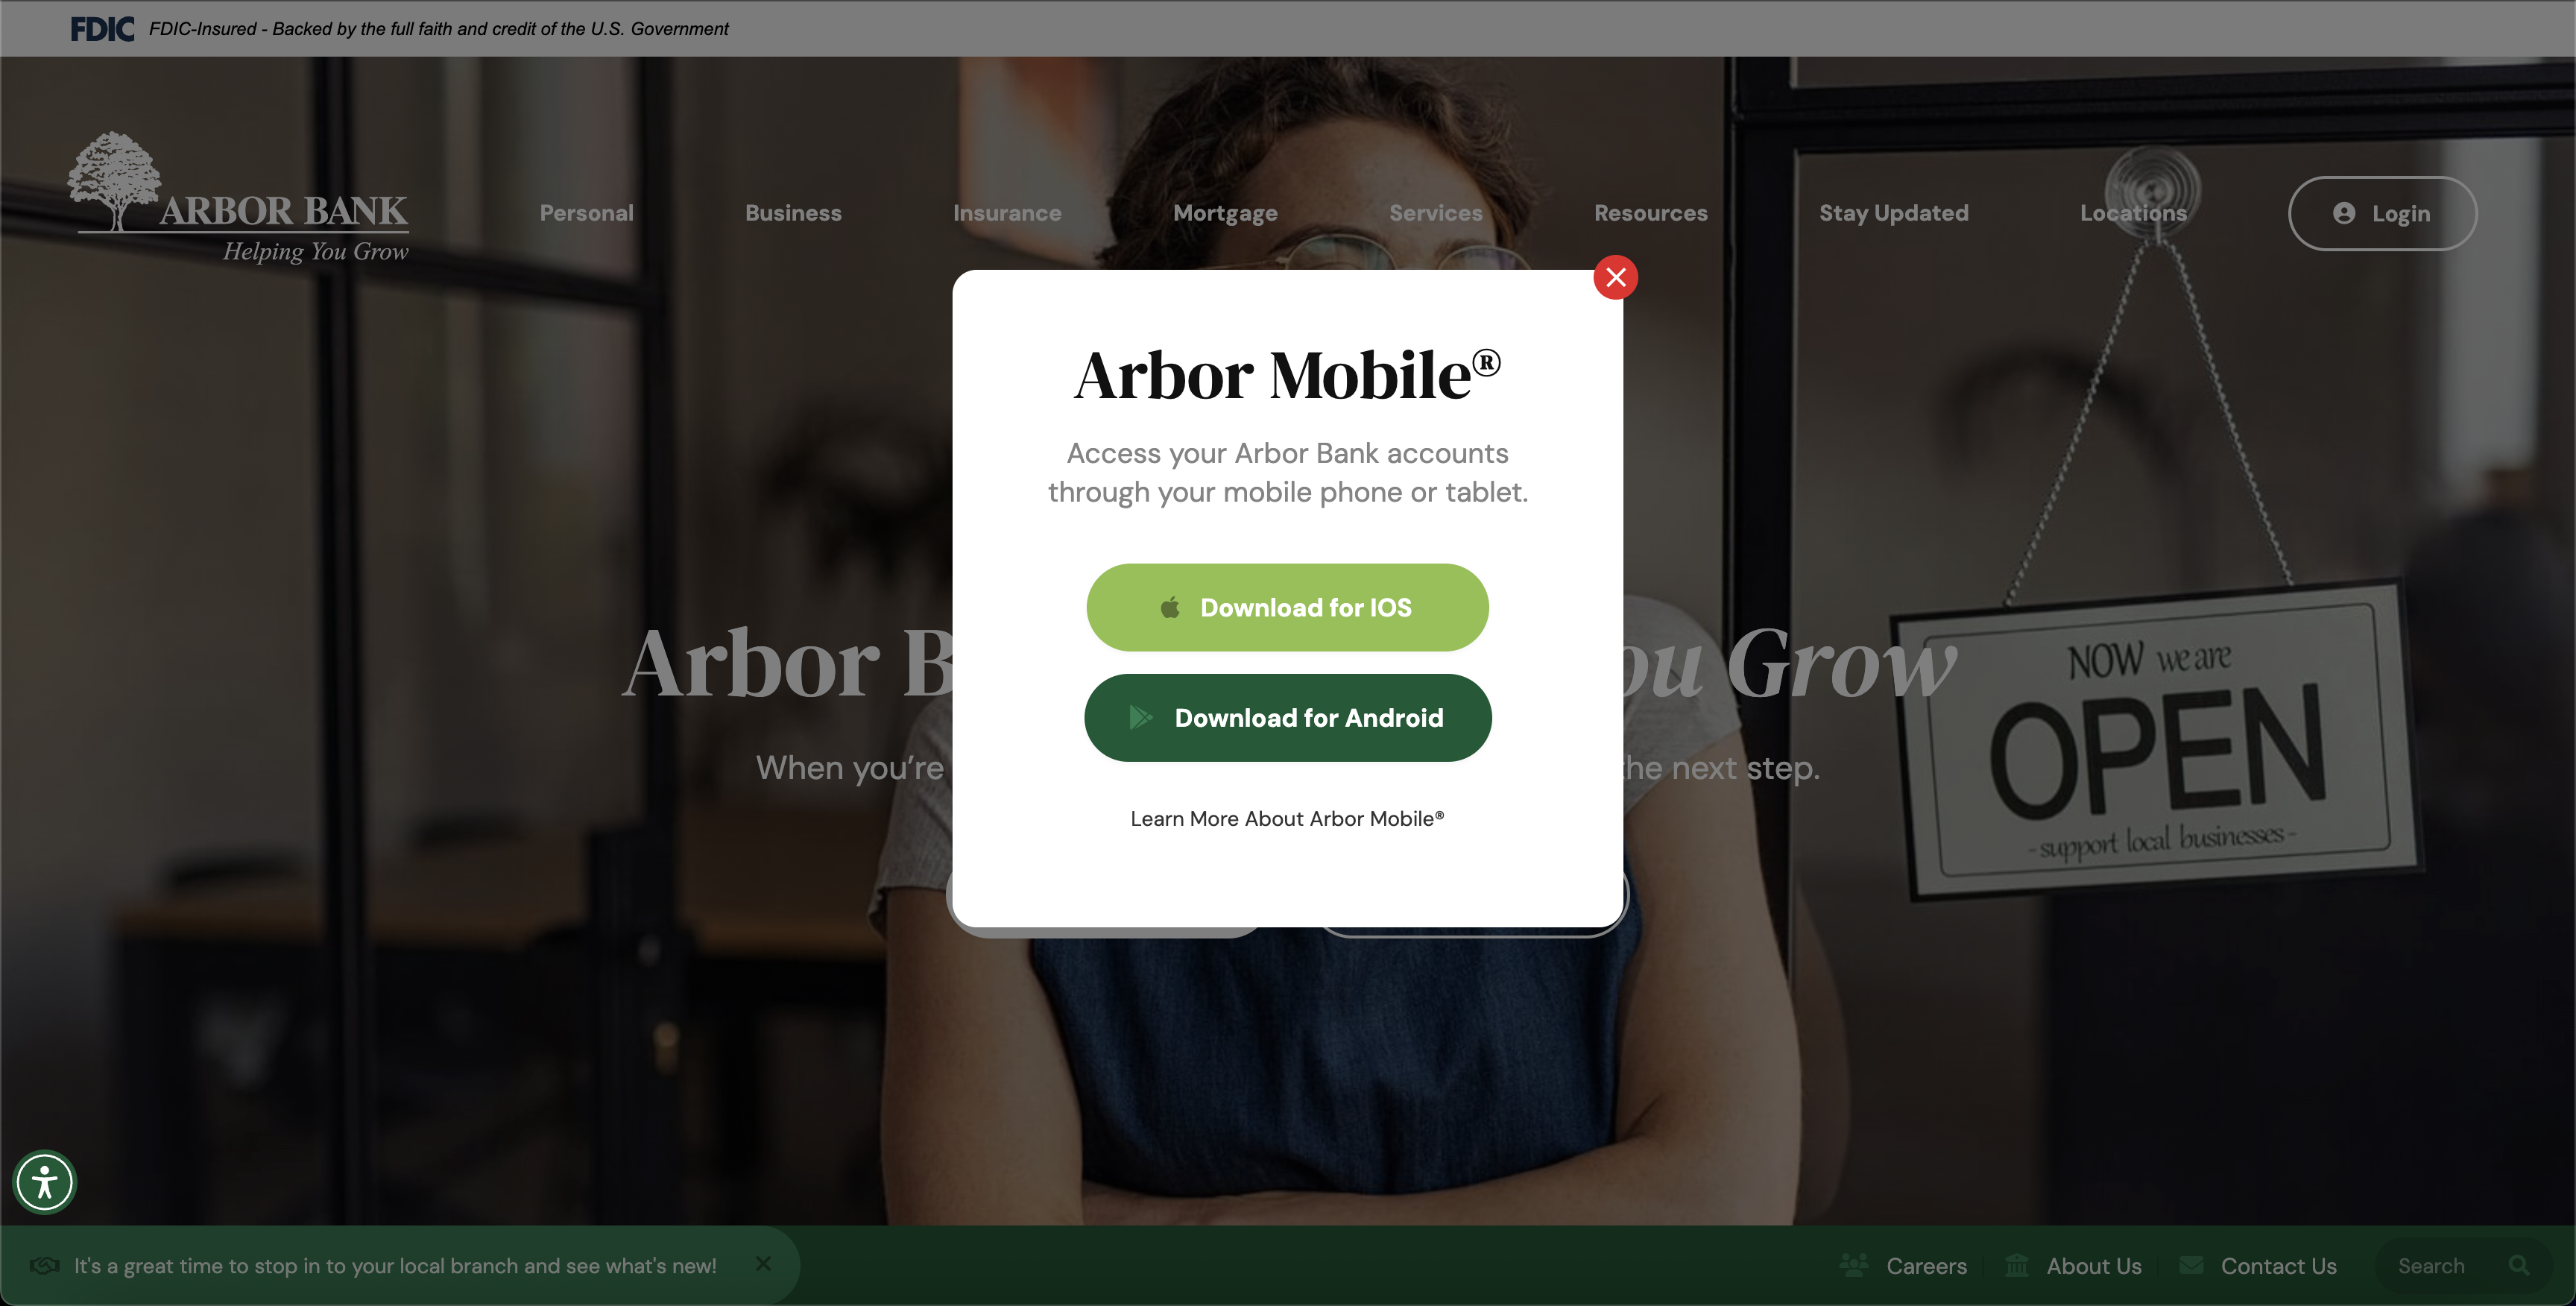
Pop-Ups
Pop-Ups appear as a box overlay when a page loads or after a set delay. It requires a user to close out of the pop-up to continue their browsing experience. They’re best used for content that needs your visitors’ full attention, such as:
-
Limited-time promotions or discounts
-
Newsletter signups
-
Important announcements
-
Policy update announcements
-
Location changes
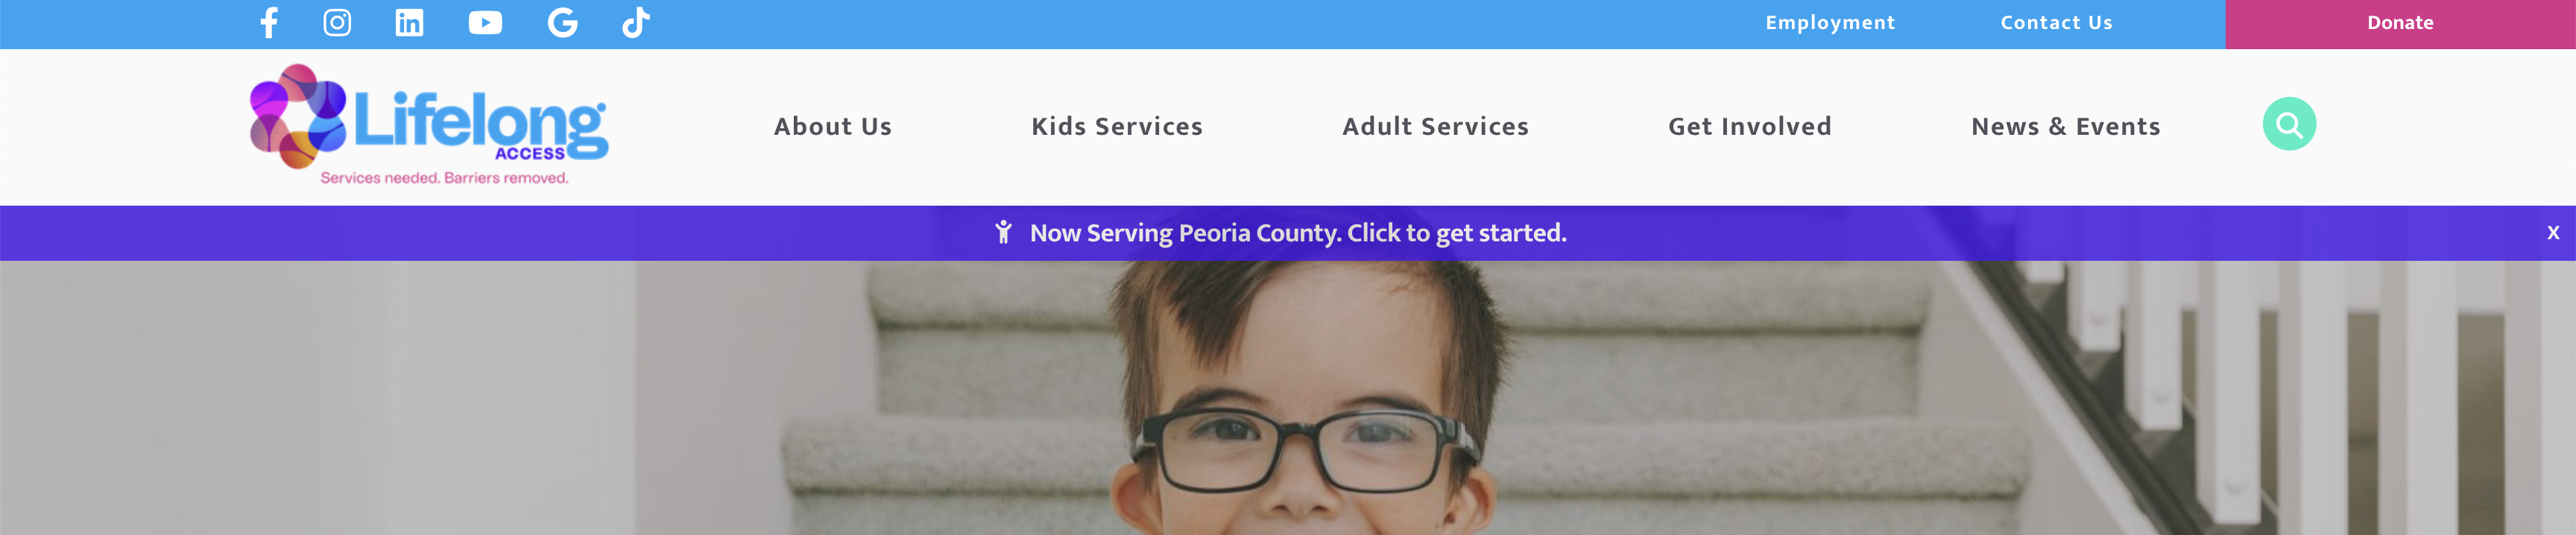
Alert Bars
Alert Bars, on the other hand, are more subtle. They display as a narrow bar across the top (or bottom) of your website and stay visible without interrupting the browsing experience.
They’re ideal for:
-
Updated business hours
-
Holiday closings
-
Service interruptions
-
Ongoing promotions or reminders
Tip: If the message is critical but not urgent—or if you want to avoid disrupting visitors—an alert bar is usually the better choice.
Adding an Alert Bar or Pop-Up
Adding one of these features to your website is simple.
-
Log into Editor. Go to your website and type
/backendat the end of your URL to access your login screen. -
Navigate to the Page. If your alert bar or pop-up is designed for a specific page, open that page first. Otherwise, these features are often managed on the "Edit Items Appearing on All Pages" tab at the very top of your Pages list.
-
Find the Block.
-
This feature block is normally titled "Announcements Banner" or "Alert Bar"
-
You may find the settings for this feature at the top of the page under "Custom Page Settings", especially if the feature is page-specific.
-
If yours is on the "Edit Items Appearing On Pages" tab, it's likely towards the bottom of the page, so scroll until you find the block with the feature's settings.
-
If you don’t see one, reach out to ClientServices@Cybernautic.com to request that it be added
Example of Multiple Alert Bars in Flex Grid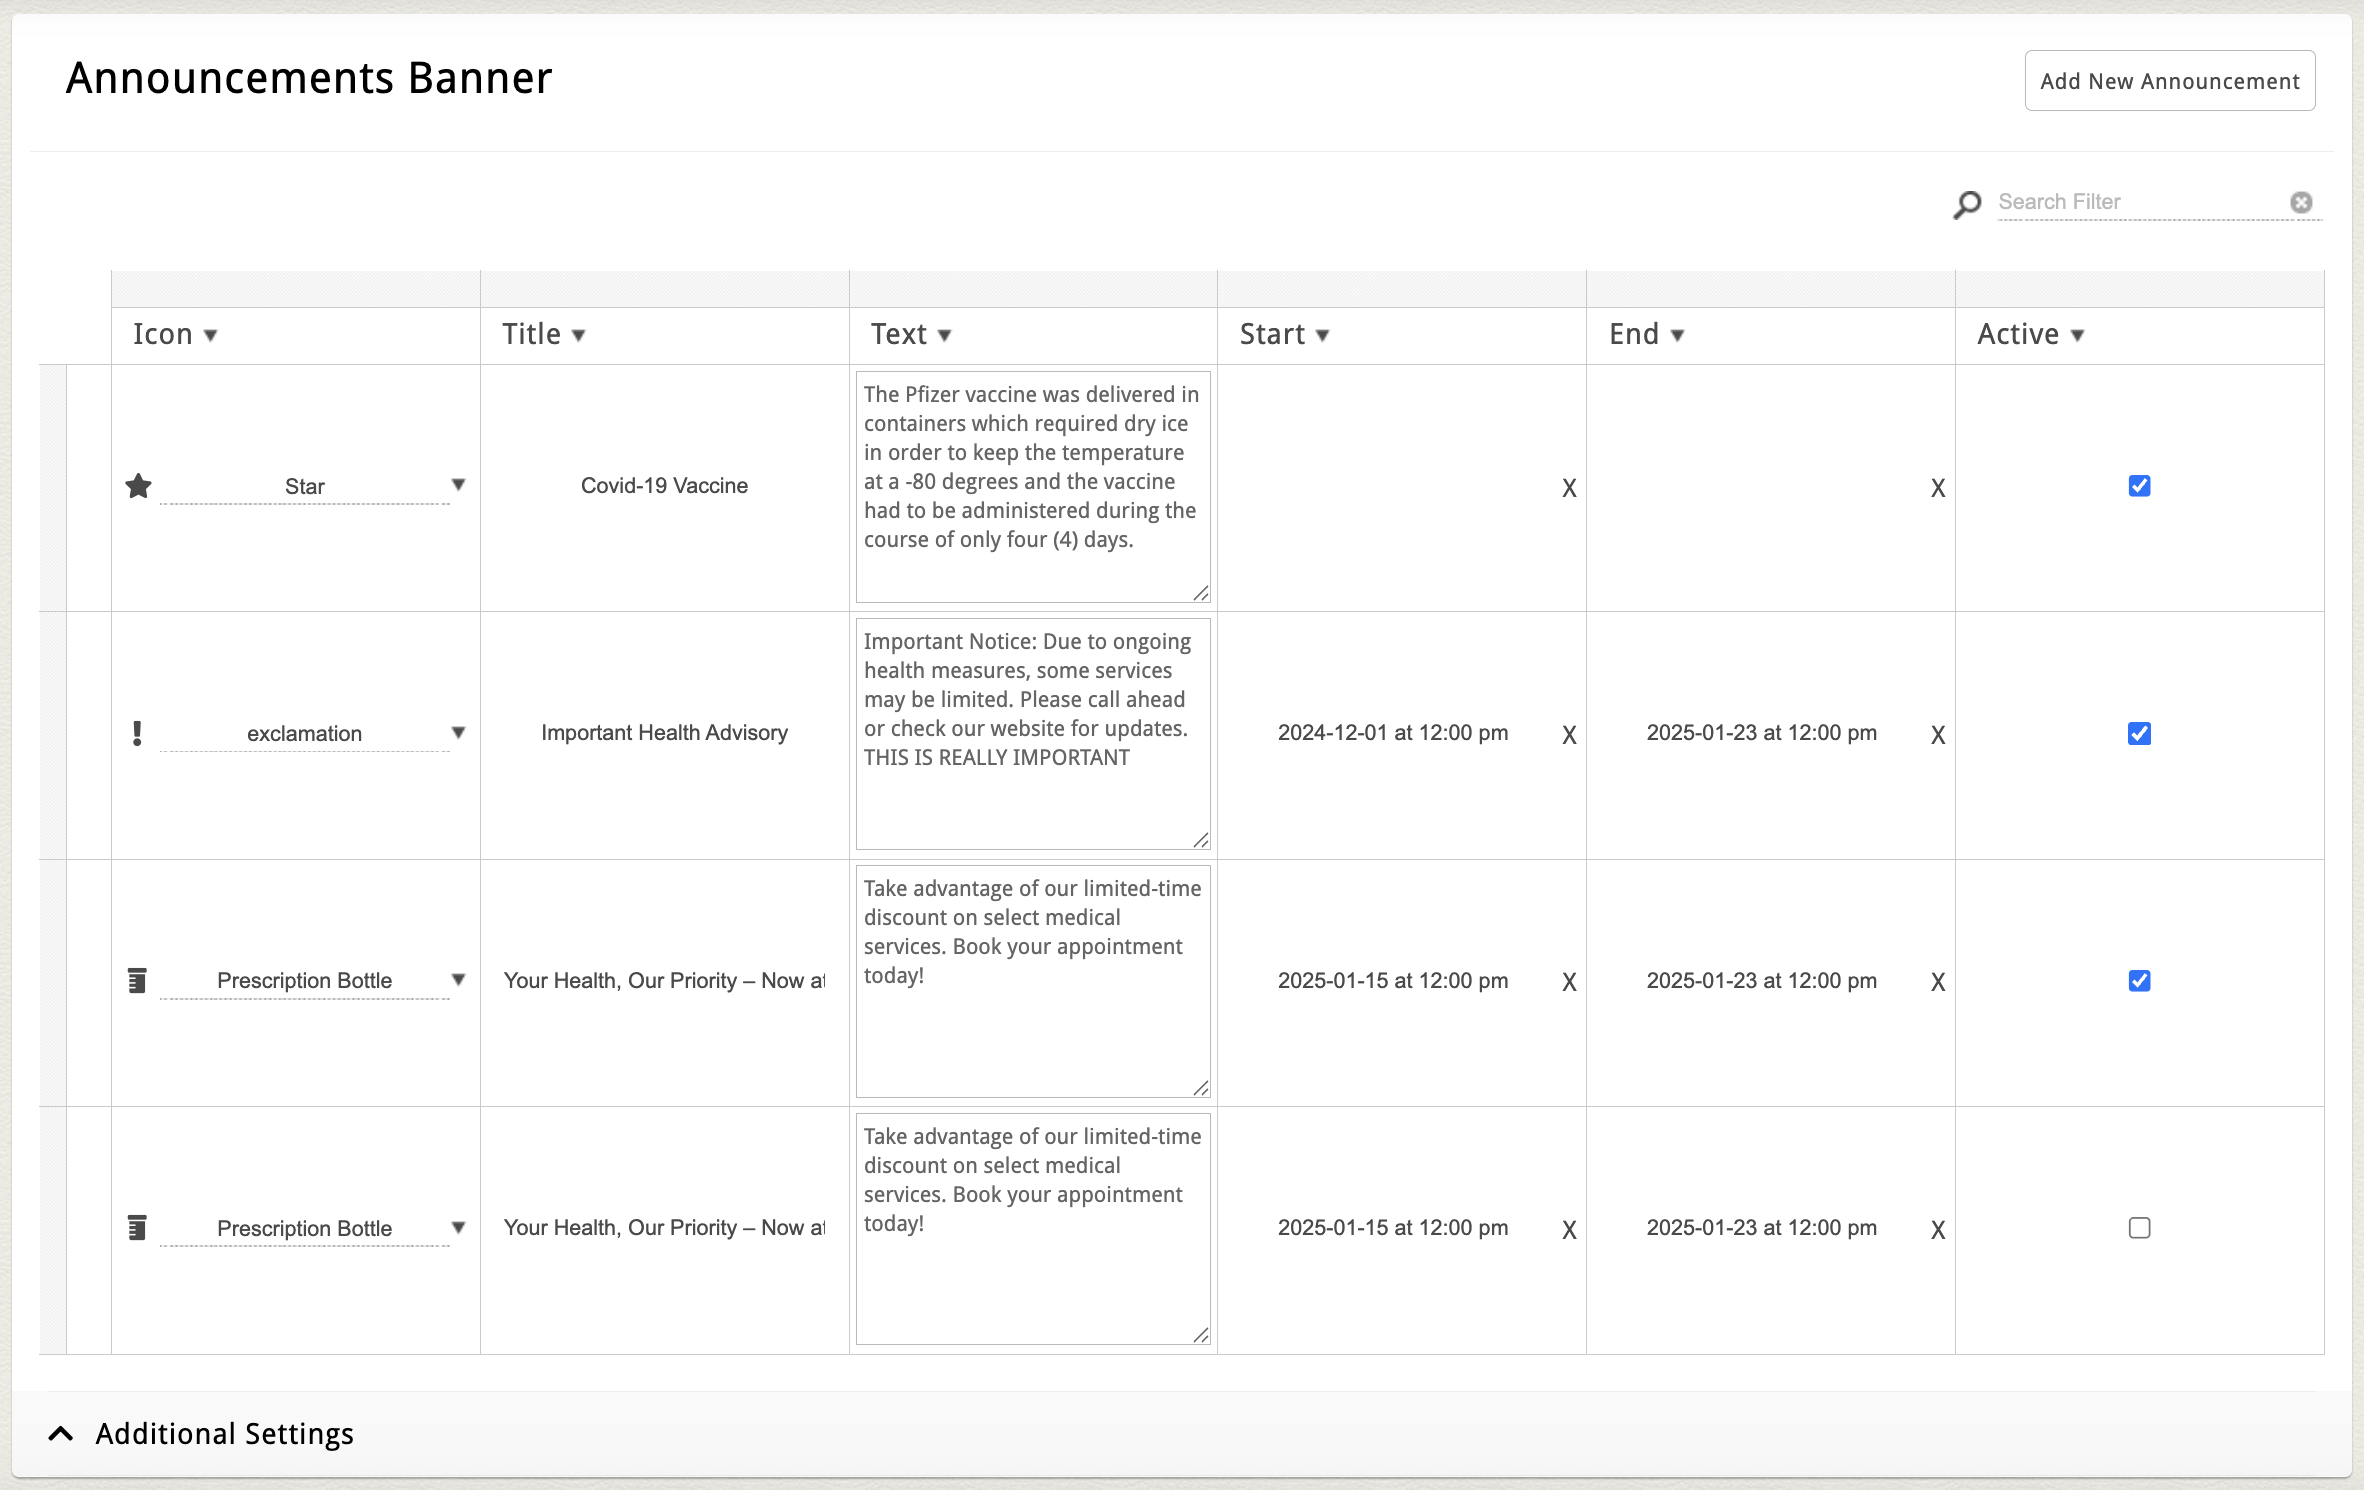
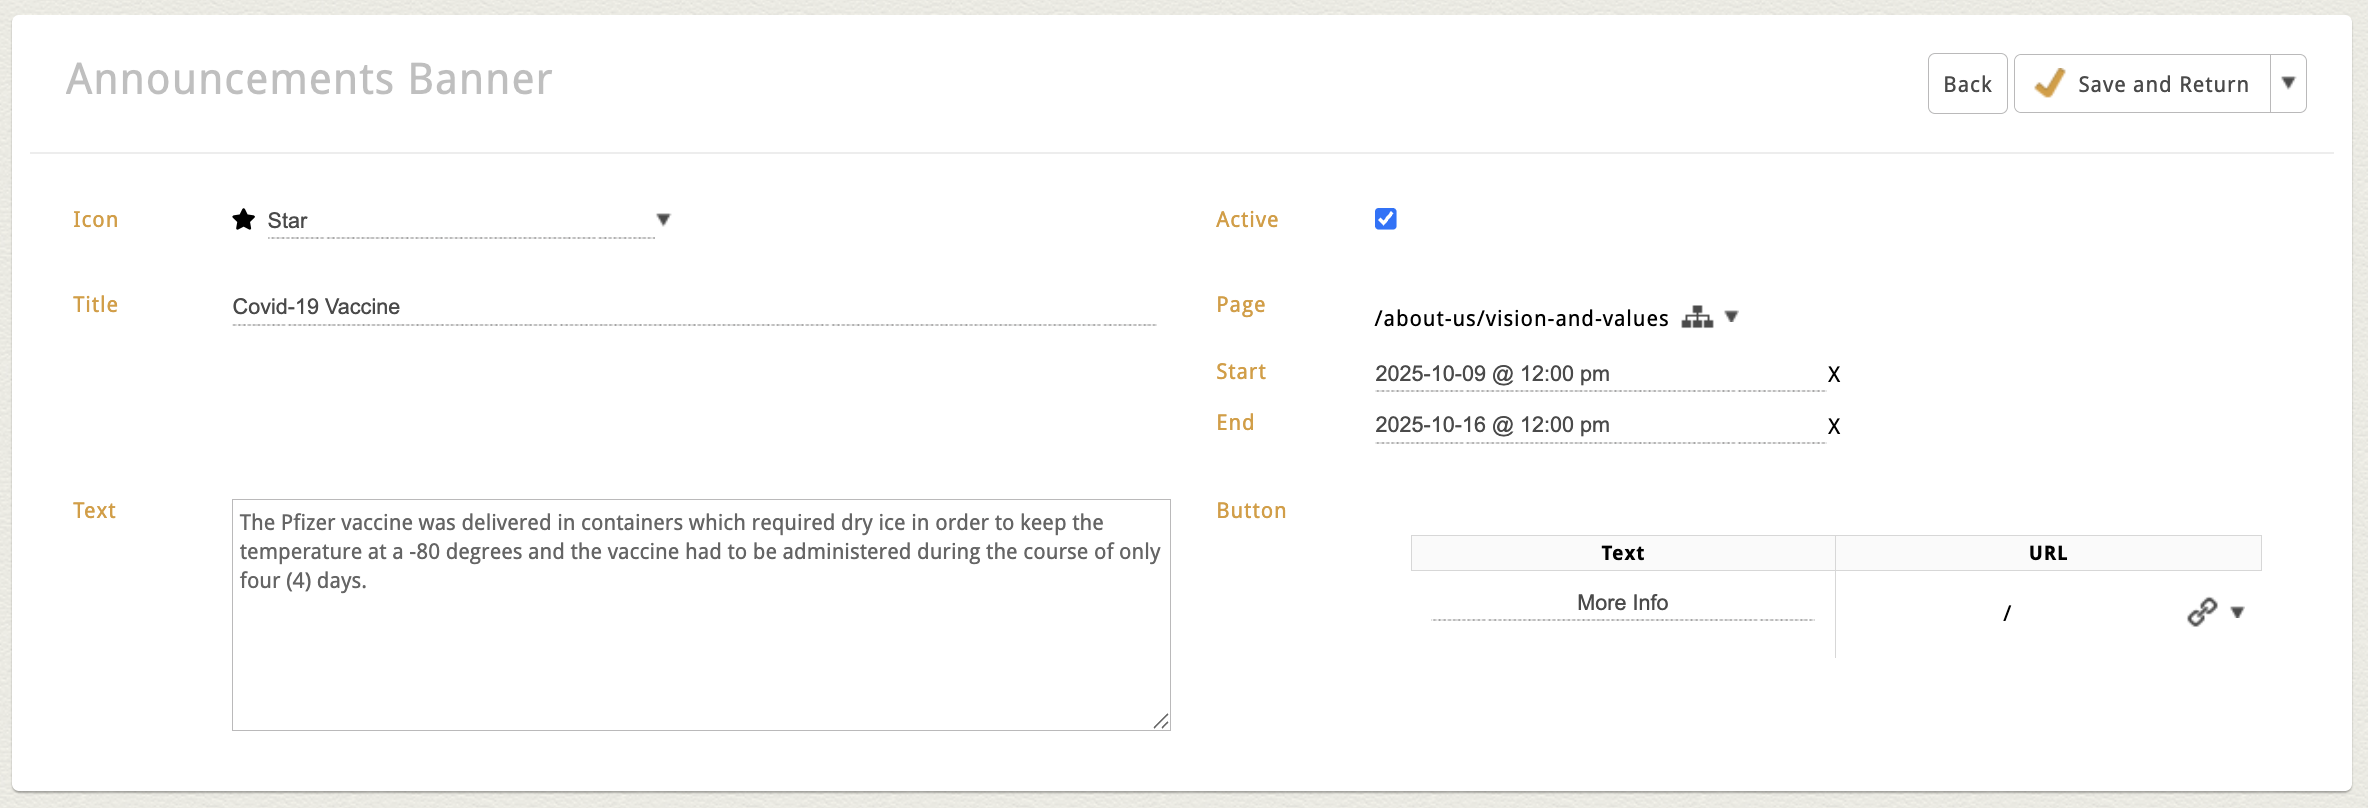
Example of Single Alert Bar with All Fields Visible in the Block Area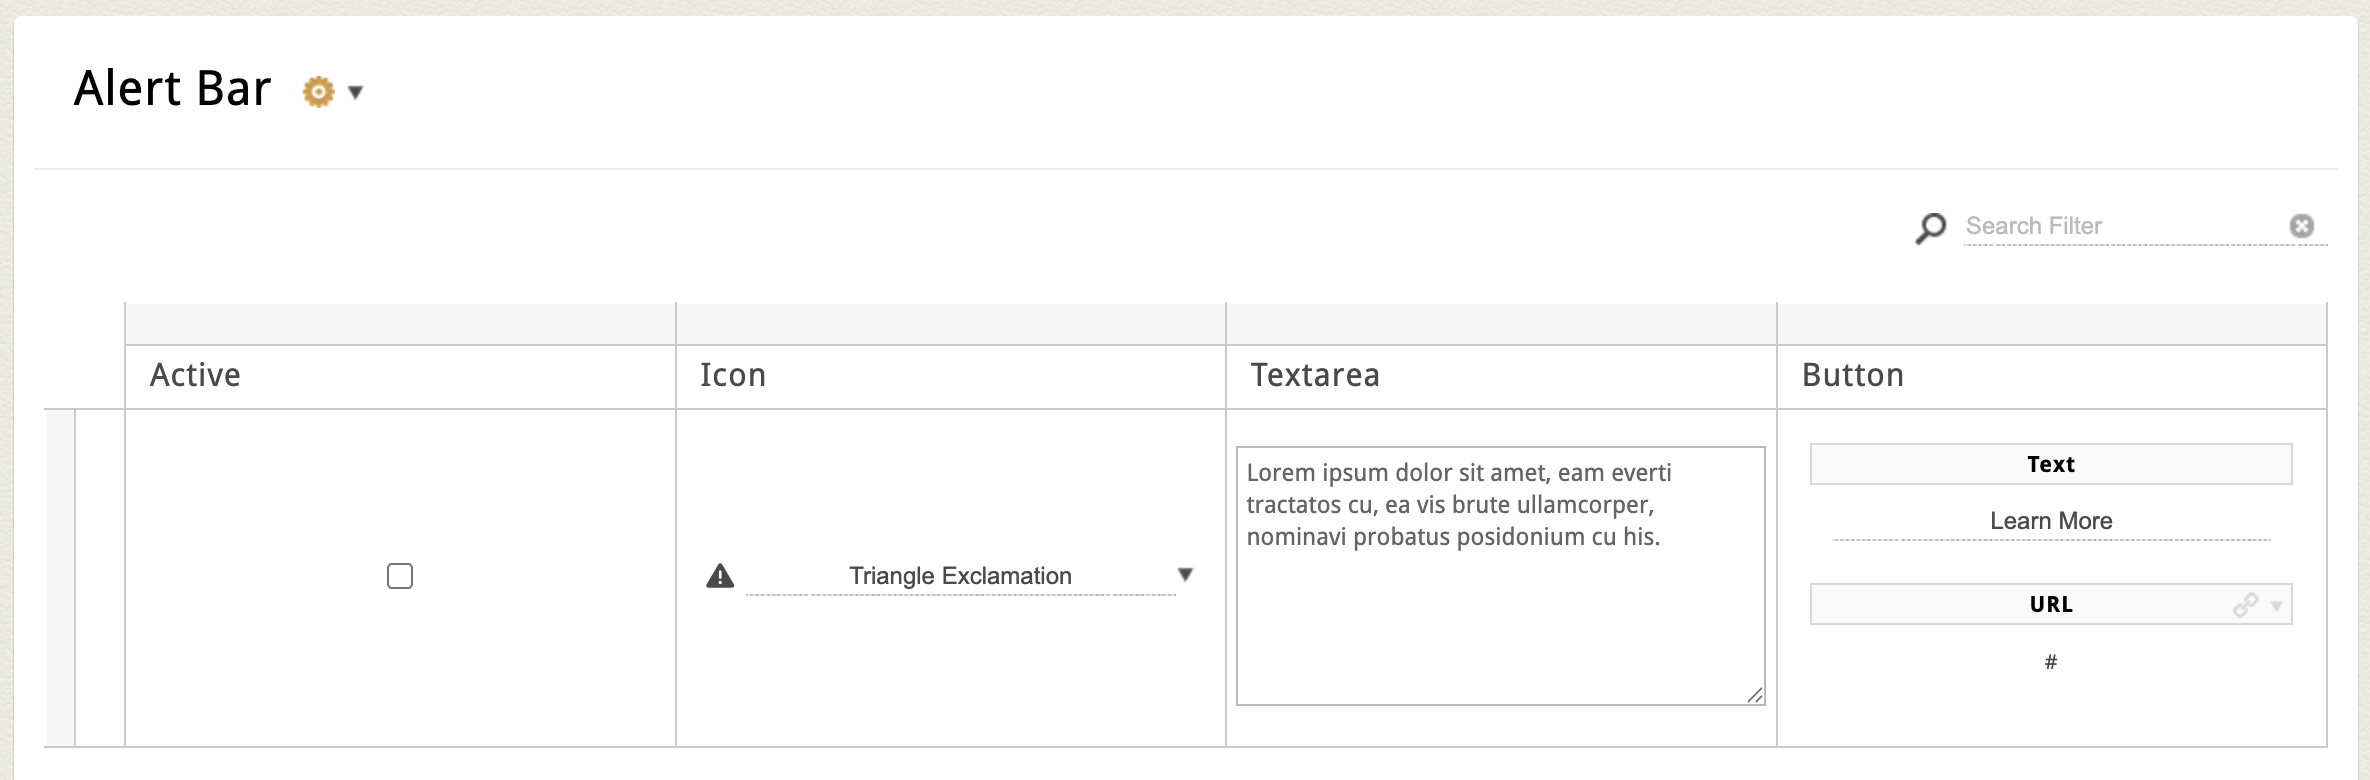
-
-
Edit the Content.
-
You can edit any of the fields for your feature that display in the block area. Alternatively, hover over any item and click the item's edit pencil to modify.
-
Enter your message text, links, or call-to-action.
-
Some layouts allow you to choose an icon or customize colors, button text, page placement and scheduling.
-
Some layouts may have an "active" checkbox as well that allows you to choose when to show the feature manually.
-
-
Save and Publish.
-
Click Save to publish your changes.
-
Choosing Placement and Timing
Depending on your site’s setup, you may have options for how and when your message appears:
-
Pop-Up Triggers – Choose to show your pop-up:
-
On page load
-
After a set number of seconds
-
Or after the visitor scrolls or clicks a specific button
-
-
Alert Bar Visibility – Choose whether your bar appears:
-
Site-wide (on every page)
-
Only on specific pages
-
During a specific time period (start date / end date)
-
Note: The visibility and timing options available depend on your site’s configuration. If you’d like to adjust these settings or add new trigger options, contact our team for help.
Tips & Best Practices
-
Keep it short. Visitors should understand your message at a glance.
-
Use clear calls-to-action. Buttons like “Sign Up,” “Learn More,” or “Shop Now” work well.
-
Avoid overload. Use only one pop-up or alert bar at a time to prevent frustration.
-
Use color strategically. Match your site’s design, but ensure it stands out enough to be noticed.