Photo Gallery
The Photo Gallery Page Type makes it easy to visually showcase your images in a clean, organized way. Whether you’re displaying of your facilities, event photos, or a project portfolio, this page type allows you to manage both single albums and multi-album galleries directly within Editor.
Creating a New Photo Page
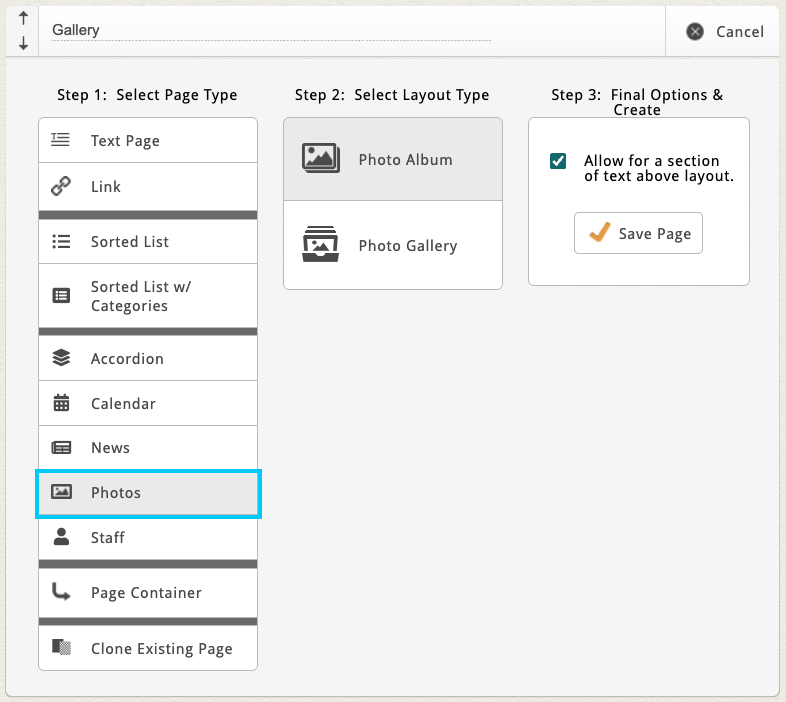
From your Add New Page menu, select Photos.
You’ll typically see two layout options:
-
Photo Album – for a single collection of images displayed on one page.
-
Photo Gallery – for a gallery view that links to multiple albums.
Give your new page a name and click Save Page to create it.
Managing a Single Photo Album
For a single collection of images displayed on one page, choose the "Photo Album" layout from your Add New Page menu. Once your album page is created—or when you open an existing album—you’ll see a few familiar sections:
-
Custom Page Settings – unique settings related to your site’s layout.
-
Introductory Text Area – great for adding summaries or page descriptions.
-
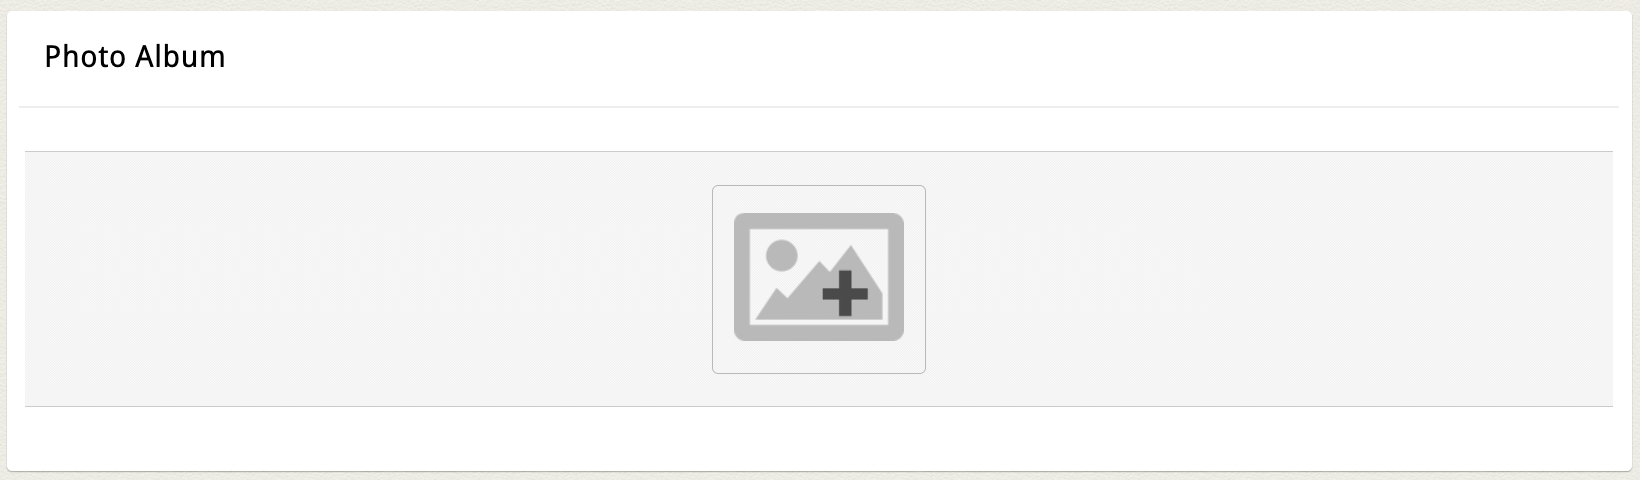
Album Block – the main section where your photos will live.
If your album is empty, you’ll see a photo icon with a plus sign. Click it to open your website’s File Manager and start adding images.
Adding Photos
Inside the File Manager, you can:
-
Use checkboxes next to each photo to select multiple images.
-
Click and drag to highlight a group of images.
-
Or upload new photos directly from your computer.
When you’ve selected your images, click Use in the top action bar. Your chosen photos will appear in a grid layout inside the album.

|
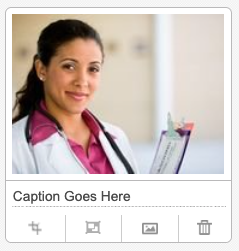
Each photo thumbnail includes several helpful tools beneath it:
|
 |
Reordering or Adding More Photos
- You can reorder images by hovering over a thumbnail and clicking-and-dragging it into a new position.
- To add more images, simply click the plus icon again to reopen the File Manager.
On the front end, clicking on any photo in the album will open the full lightbox viewer, where users can scroll through the album seamlessly.

Managing a Gallery with Multiple Albums
If your page is set up as a Photo Gallery, you can manage multiple albums within one page—perfect for organizing photos by event type, category, or year (e.g., “Weddings,” “Corporate Events,” “Behind the Scenes”).
To create a gallery:
-
From the Add New Page menu, choose Photos, then select Photo Gallery.
-
Click the photo icon with the plus sign to create your first album.
You’ll be prompted to enter:
-
Album Title – Displays below the album thumbnail on the gallery page.
-
Album Description – Depending on your site, this may be a plain text field or a fully formatted text area.
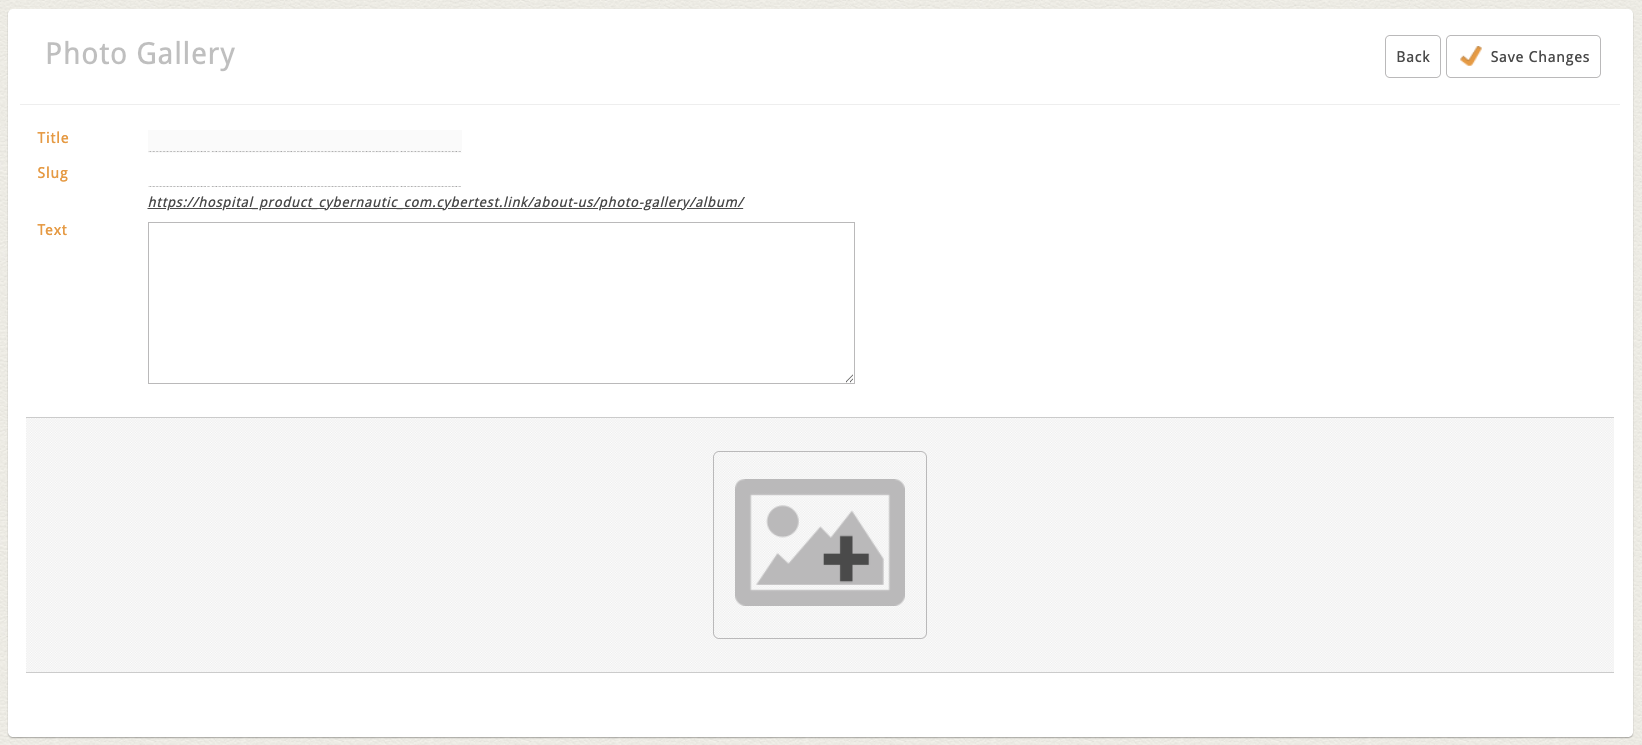
Then, click the image icon to open your File Manager and add photos to the album.
Note: The first image in the album will automatically become the album thumbnail preview in your gallery view.
Click Save Changes to finalize your album.
Managing Albums
Once you’ve saved your first album, it will appear in your Gallery Block along with a thumbnail preview and action icons:
-
Edit (Pencil Icon) – Opens the album for full editing.
-
Delete (Trash Can Icon) – Removes the entire album.
You can add additional albums by clicking the photo icon again or reorder albums by dragging and dropping them into your preferred order.
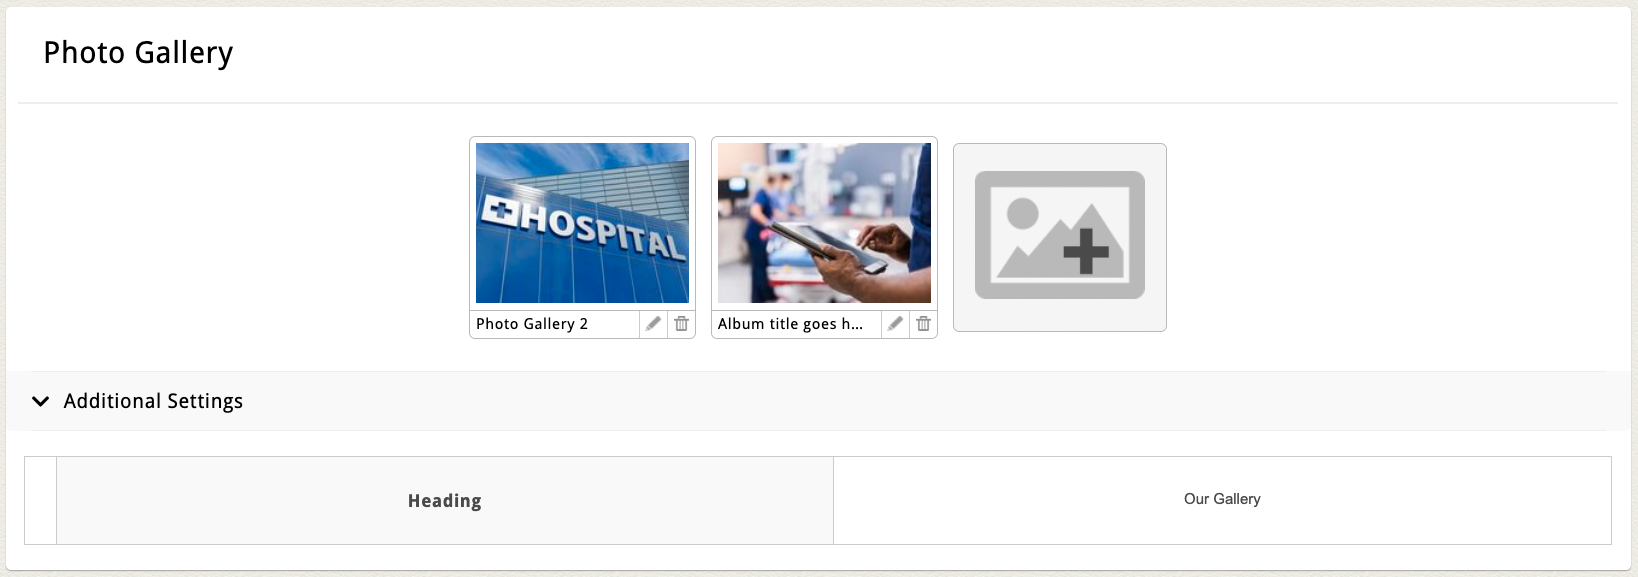
Additional Settings
Some photo album or gallery blocks include an Additional Settings section near the bottom of the page.
This may include options to:
-
Adjust how images display (grid spacing or image ratio)
-
Change the number of columns shown
-
Edit a block heading or layout alignment
These settings vary by site. If you’d like additional customization—like lightbox caption styles, filters, or layout toggles—email clientservices@cybernautic.com to discuss options.
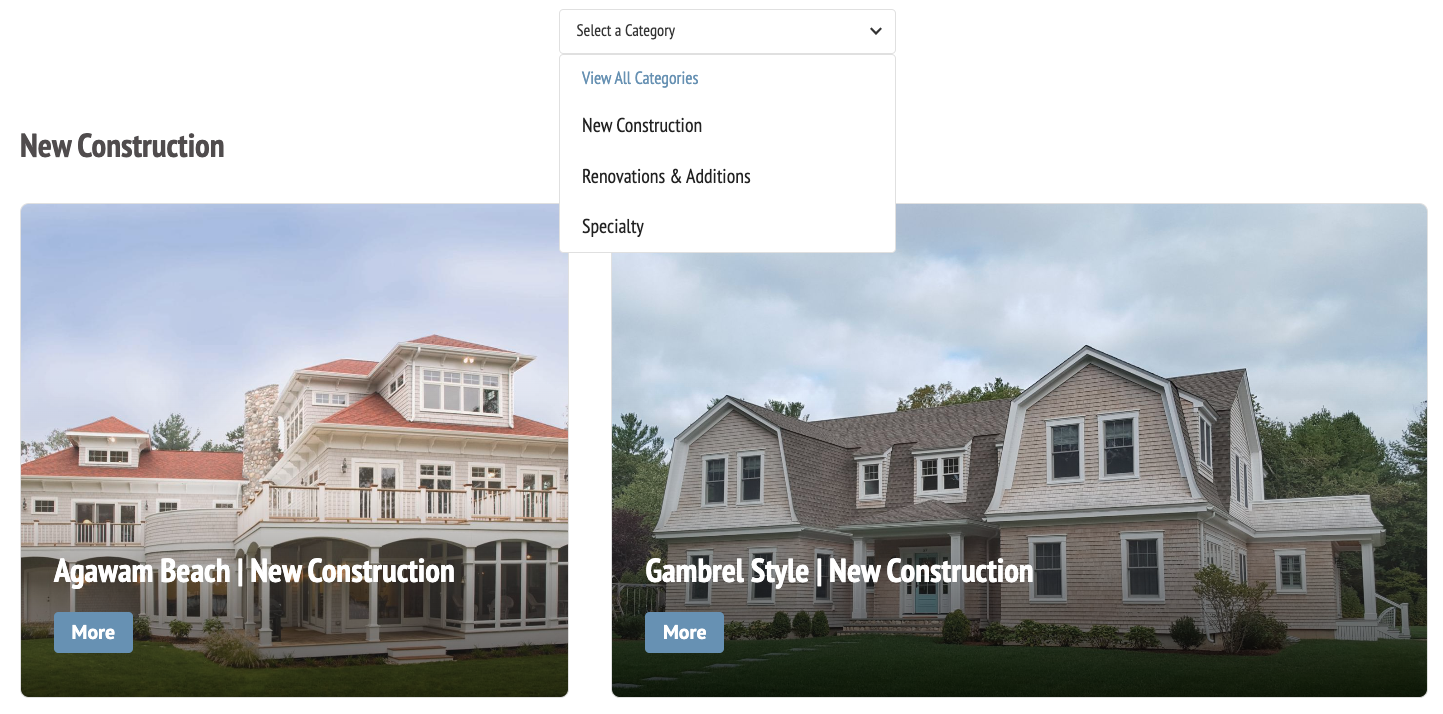
Photo Galleries with Categories
Some galleries may include an added layer of organization using Categories.
If your gallery supports Categories, you’ll see a second block labeled Categories directly below your main Gallery Block.
Each category typically includes:
-
Title
-
And sometimes a Photo and/or Description
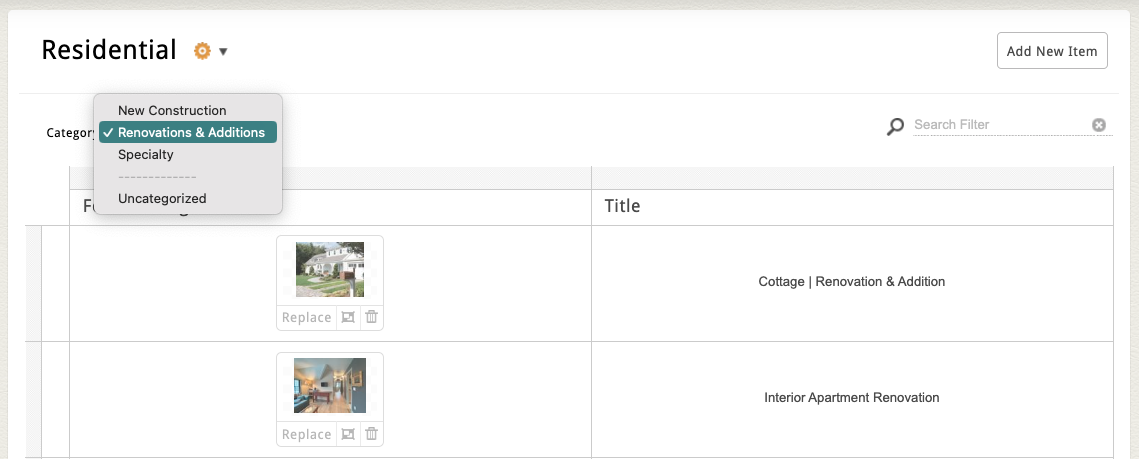
For example, if you're organizing portfolio photos, you could create categories for different types of projects:
-
New Construction
-
Renovations & Additions
-
Specialty
Add a New Category
Note: If your Gallery Block supports categories but none are currently added, all albums will automatically be grouped as “Uncategorized.”
To add a new category:
-
Click the Add New Category button in the top-right corner of the Category Block.
-
Enter your category title (and other required fields).
-
Click Save and Return.
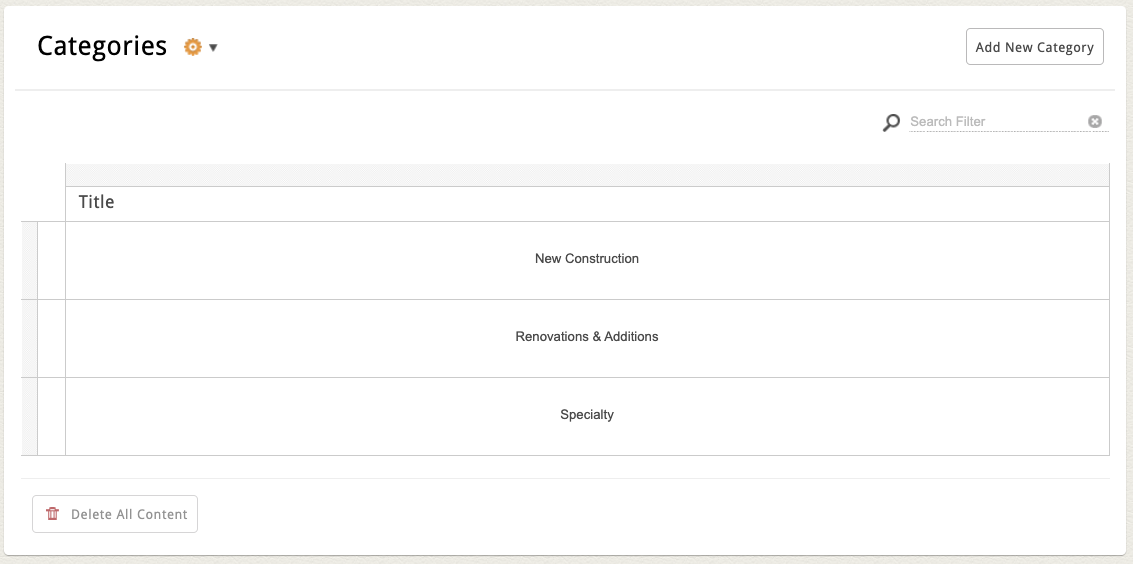
Assign a Category
After saving a new category:
-
You’ll see a Category Dropdown option in both the flex grid and the album’s edit screen.
-
To assign a category, select it from the dropdown and click Save and Return.
Tip: Some websites allow category assignment directly from the flex grid. If you’d like this option, we can customize your grid layout.